Can-Am Ryker Hood with Built In Speaker
Can-Am Ryker Hood with Built In Speaker
SKU:SH-7256+7156
- Features
- FITMENT GUIDE
- Included
- Installation
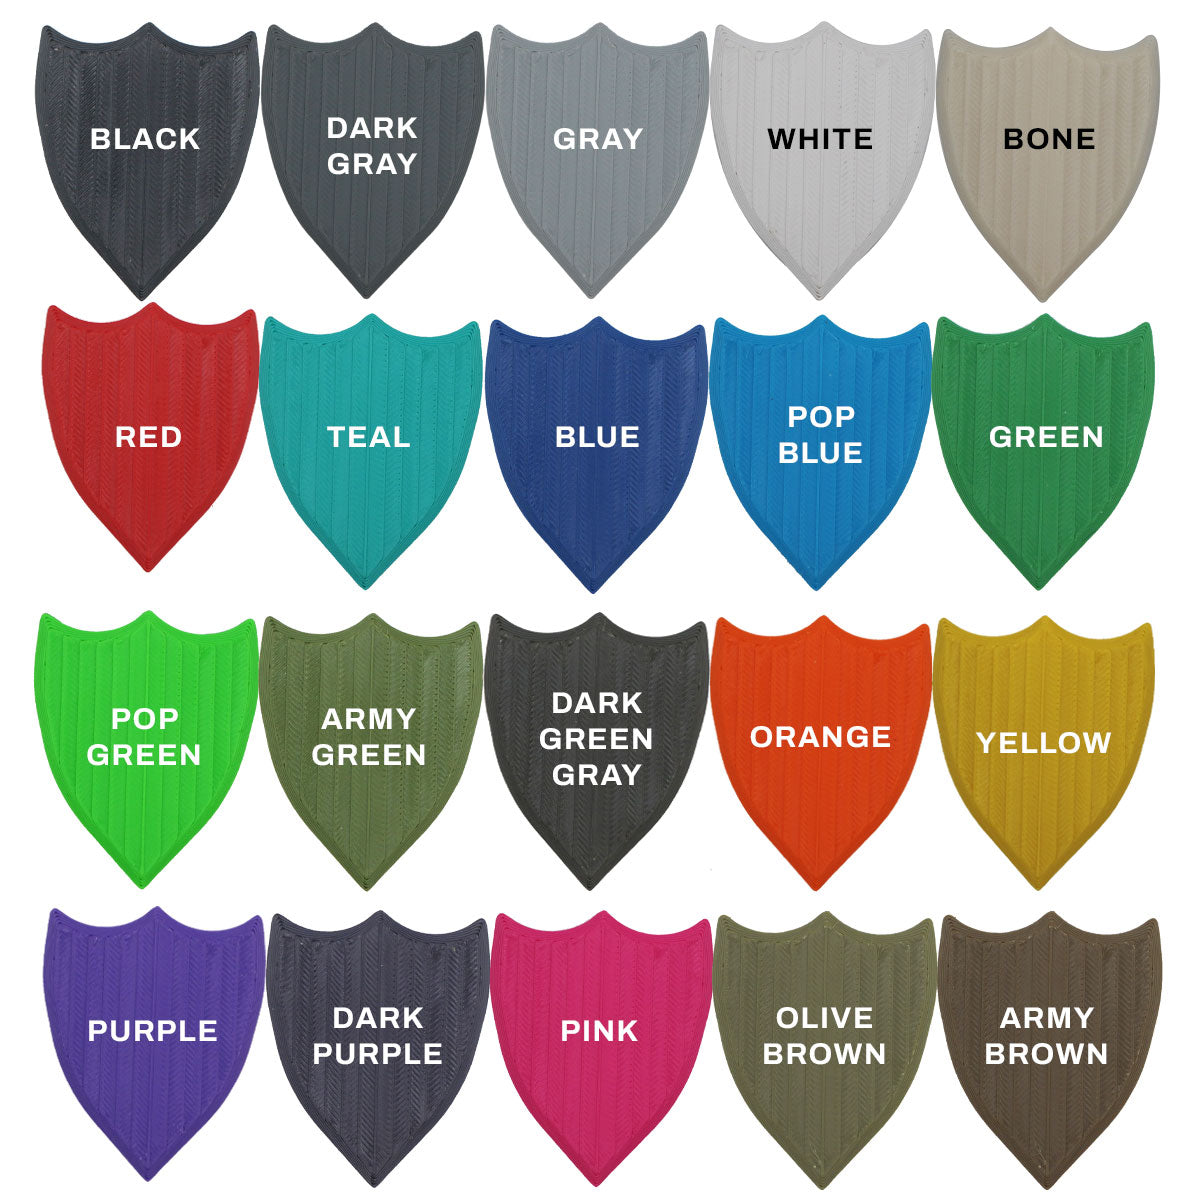
This product is 3D printed and will be a matte finish. You are able to sand and paint it to be a gloss finish to match your Ryker.
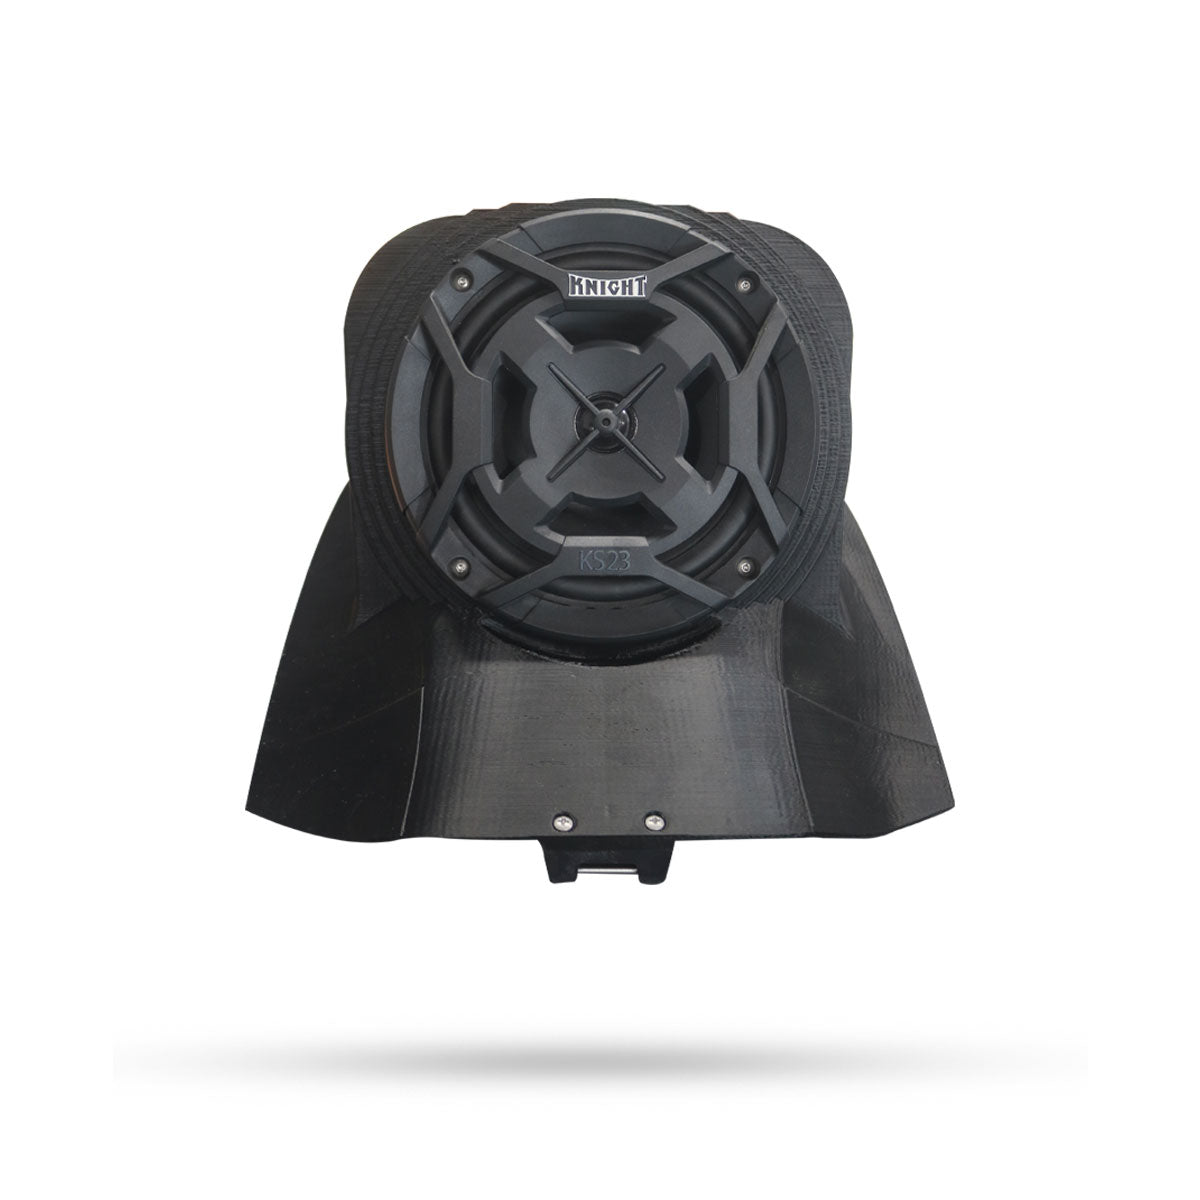
Waterproof Ryker Hood Speaker kit built for rain, high speed, and riding conditions.
Custom designed to completely replace the Can Am Ryker Hood.
Includes a completely hood replacement with your choice of (1) 6.5" or (2) 4" marine-grade speakers, (2) 4" marine-grade speaker side pods, and a Bluetooth amplifier.
Built-in RGB LED lights in each speaker, controlled by the included remote or smartphone app (iOS & Android)
Plug-and-play wiring harness
Note: Speaker kits with custom color housings are made to order. Production takes up to 5 days, and we'll ship your order as soon as it's ready.
2019 to 2025 Can Am Ryker
Simply remove your hood (two screws) and replace it with this!
Please email Sales@KnightATV.com or Call us at 732-737-7761, if you are looking for a different model and we will move it up on our production list.
-
(1) Hood speaker with Knight ATV Marine Speakers
- (Size and QTY based on selection)
- (2) 4" Knight ATV Marine Speaker Side Pods
- (1) Bluetooth Marine Amplifier
- (1) Smart Handlebar Remote Controller
- Plug-and-Play Wiring Harness
- Replacement latch and pins
- Waterproof On/Off Button
- LED Kit + Remote
- 2-Year Warranty
This video shows our 2 speaker design but the process is exactly the same when installing this 6.5" speaker.
- Open your hood and unscrew the two screws holding it on, at the hinge.
- Remove all of the push fasteners on the right side of the storage bin, just behind the head light, so that you can remove the right fairing.
- Using the new supplied screws, screw the new hinge into the same holes that you just removed in the first step.
- Line up the new speaker hood and put it in place, look through the holes in the front to line up the hinges.
- Push the hinge pin into the hinge holes, use a Philips head screw driver to get it all the way in. DO NOT HIT IT WITH A HAMMER. The pin is a slip fit, there is some resistance but it should slide in by hand. If it is not going in check your alignment, NEVER HIT IT WITH A HAMMER.
- Get the hinge pin centered as best you can, then screw the set screws into each side to lock the hinge pin in place.
- Run the power wires down the right side, behind the head light, to the battery.
- Connect red to positive and black to negative.
- Reinstall the right fairing with the push fasteners.
- Close the hood and you are done!
Couldn't load pickup availability
Features
This product is 3D printed and will be a matte finish. You are able to sand and paint it to be a gloss finish to match your Ryker.
Waterproof Ryker Hood Speaker kit built for rain, high speed, and riding conditions.
Custom designed to completely replace the Can Am Ryker Hood.
Includes a completely hood replacement with your choice of (1) 6.5" or (2) 4" marine-grade speakers, (2) 4" marine-grade speaker side pods, and a Bluetooth amplifier.
Built-in RGB LED lights in each speaker, controlled by the included remote or smartphone app (iOS & Android)
Plug-and-play wiring harness
Note: Speaker kits with custom color housings are made to order. Production takes up to 5 days, and we'll ship your order as soon as it's ready.
FITMENT GUIDE
2019 to 2025 Can Am Ryker
Simply remove your hood (two screws) and replace it with this!
Please email Sales@KnightATV.com or Call us at 732-737-7761, if you are looking for a different model and we will move it up on our production list.
Included
-
(1) Hood speaker with Knight ATV Marine Speakers
- (Size and QTY based on selection)
- (2) 4" Knight ATV Marine Speaker Side Pods
- (1) Bluetooth Marine Amplifier
- (1) Smart Handlebar Remote Controller
- Plug-and-Play Wiring Harness
- Replacement latch and pins
- Waterproof On/Off Button
- LED Kit + Remote
- 2-Year Warranty
Installation
This video shows our 2 speaker design but the process is exactly the same when installing this 6.5" speaker.
- Open your hood and unscrew the two screws holding it on, at the hinge.
- Remove all of the push fasteners on the right side of the storage bin, just behind the head light, so that you can remove the right fairing.
- Using the new supplied screws, screw the new hinge into the same holes that you just removed in the first step.
- Line up the new speaker hood and put it in place, look through the holes in the front to line up the hinges.
- Push the hinge pin into the hinge holes, use a Philips head screw driver to get it all the way in. DO NOT HIT IT WITH A HAMMER. The pin is a slip fit, there is some resistance but it should slide in by hand. If it is not going in check your alignment, NEVER HIT IT WITH A HAMMER.
- Get the hinge pin centered as best you can, then screw the set screws into each side to lock the hinge pin in place.
- Run the power wires down the right side, behind the head light, to the battery.
- Connect red to positive and black to negative.
- Reinstall the right fairing with the push fasteners.
- Close the hood and you are done!